We are open Monday to Friday
Product Hotline - 01993 704 981
Local call rate - 0208 0909586
Studio Ceiling System Installation Guide
Download this as a PDF file HERE
BE SURE TO READ THESE INSTRUCTIONS THOROUGHLY BEFORE COMMENCING ANY WORK PLEASE NOTE !! THIS PRODUCT IS VERY HEAVY AND REQURIES TWO PEOPLE TO CARRY IT.
NOTE. THESE INSTRUCTIONS MUST BE FOLLOWED OTHERWISE INCORRECT INSTALLATION COULD OCCUR WHICH MAY HAVE A DETRIMENTAL EFFECT ON THE PERFORMANCE!
Introduction
The Studio Ceiling soundproofing system is designed to reduce noise nuisance from above and is used as part of the system to bring new separating floors into compliance with the current Building Regulations. Although it may not be possible to carry out work on the floor above very appreciable results can still be gained by carrying out the following treatment from below.

Step 1.
Remove all electrical fittings (see note at the end of these instructions).
Step 2.
Remove existing ceiling and dispose according to local authority regulations. Take care to wear eye protection and a suitable dust mask before undertaking this task and it is also advisable to wear a hard hat and overalls or old clothes.
Step 3.
Brush off the underside of the floor above so that it presents a reasonable clean surface.
Step 4.
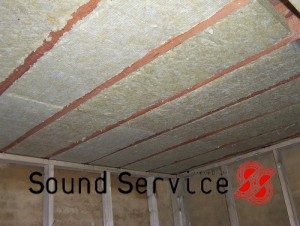
 Using our supplied special aerosol contact adhesive, bond the 100mm thick AMW100 Acoustic Mineral Wool to the underside of the floor between the joists by cutting the slabs to be a loose fit using a long bladed sharp knife which will require frequent resharpening. Glue the AMW sections to the underside of the floor above and use the offcuts as well. The adhesive has an adjustable nozzle so it is usually better to select the widest spray pattern by turning the nozzle so it aligns with the symbol and usually marked H at one o’clock to the nozzle. The other settings are M and L for medium and low spray pattern. (See application instructions on side of can). (For a superior result our SoundBlocker Membrane can be used instead of the AMW)
Step 5.
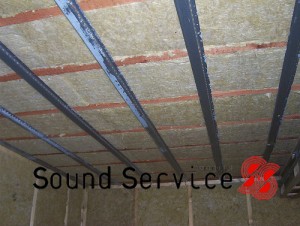
Screw 15mm thick Resilient Bars across the joists at 400mm centres using the pre-drilled holes on the bars. 38mm Self-drilling screws can be used for this and also the fixing of the plasterboard to the bars.
Step 6.
Mark the position of the bars and the joists with pencil on the walls so it will be known where they are when fixing the following products. Screw a 12.5mm or 15mm layer of Acoustic Plasterboard to the bars taking note of the wall marks and taking care not to hit the joists with the screws. Install the plasterboard so there is a very narrow gap between the plasterboard and the walls. Just 1mm will suffice.
Step 7.

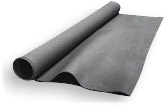
Cut the SoundBlocker Membrane into manageable sizes not exceeding two square metres and glue them to the ceiling or first layer of plasterboard just fixed. Use the special aerosol adhesive previously described for this and spray an appropriate area on the ceiling then spray the membrane and fix it directly to the previously glued spot taking care to position it carefully from the start. Exact jointing is not essential and any gaps should be avoided whenever possible and ensure the entire ceiling is covered with the membrane wall to wall.
Step 8.
Screw a layer of 15mm high density Acoustic Plasterboard on top sandwiching the membrane. Ensure the screws are correctly placed by referring to the marks on the walls. Again another 1mm gap is required where the plasterboard meets the walls. This gap should then be filled with our supplied Acoustic Sealant then smoothed off flush with the plasterboard. Take care to follow the instructions printed on the sealant cartridge. If this second layer of plasterboard is taper edged then the joints can be filled and finished before decorating otherwise you have to have the boards plaster skimmed first.
Step 10.
Holes for any electrical wiring should be sealed with our Acoustic Sealant before refitting any electrical fittings.

NOTES
It is strongly advised that a qualified electrician is used to remove and reinstate all electrical fittings and ensures that any wiring is long enough to allow for the additional thickness of your new sound insulated ceiling.
Plated screws should be used to reduce the risk of them corroding and they should be fitted so that the heads are just below the surface of the plasterboard.
If it is a concrete ceiling then ignore all references to insulation being applied to a timber suspended ceiling unless the ceiling is fixed to additional timber supports.
The contractor shall be responsible for the examination and acceptance of all conditions and project suitability prior to the installation.

